How To

Create Listing Visuals Buyers Can Understand Fast

Choose the guide that matches the listing you are working on: land concepts and seasons, or room staging and clean-up edits.

Every screenshot below has red outlines showing exactly where to click. Click any screenshot to zoom.

Land

I am selling land or acreage

Generate structure concepts, all four seasons, and a location-aware seasonal image from a land photo.

Seasonal land listing visuals created with Listing Wand.
Land visuals
Open land guide

Rooms

I am improving interior listing photos

Virtually stage empty rooms, clean up occupied rooms, polish lighting, and download room visuals for marketing.
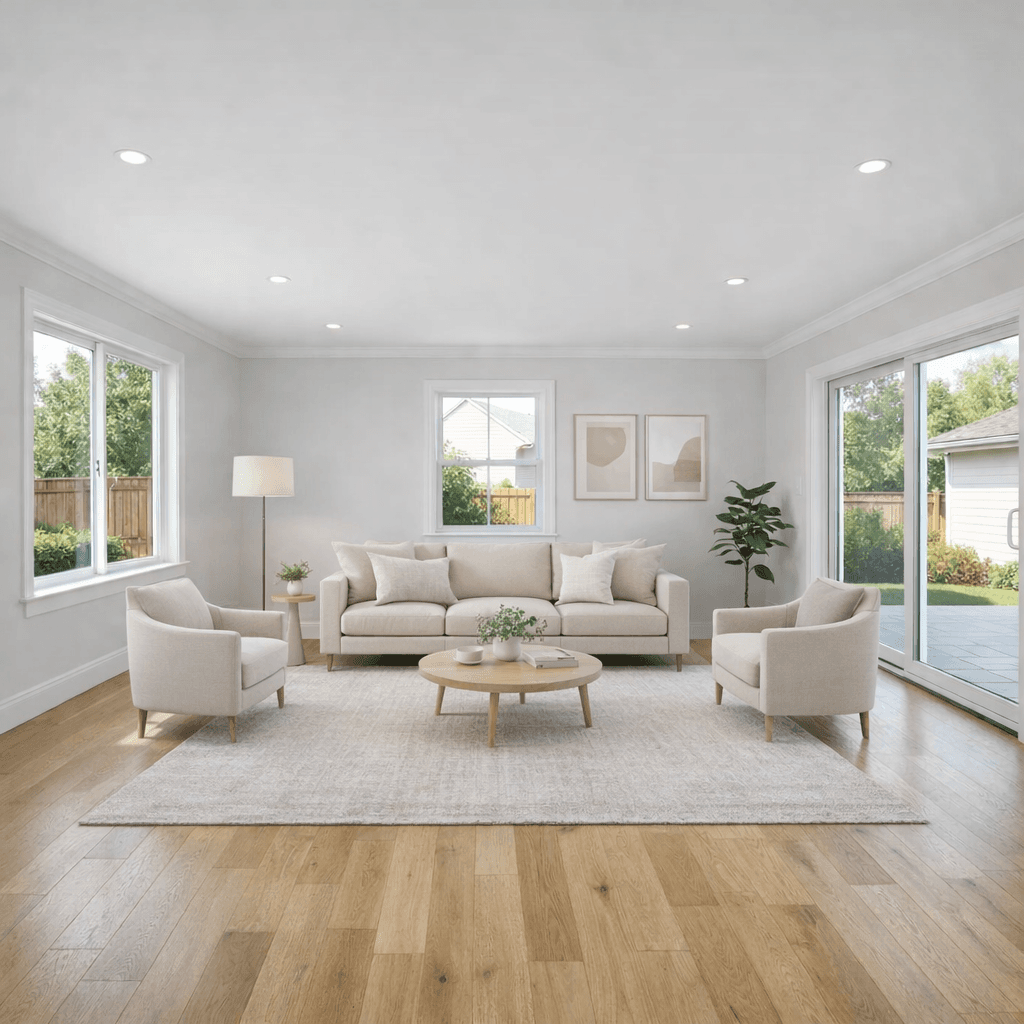
Virtually staged living room created with Listing Wand.
Room staging
Open room guide

Empty Room Staging

Compare real before-and-after room staging examples.

Use the empty-room examples page when you want to see how Listing Wand handles furniture scale, room type, accuracy, and disclosure-ready staging across multiple blank interiors.

View Empty Room Virtual Staging

Land Listings

Show Buyers What The Land Could Become

Use this walkthrough when you are selling vacant land, acreage, lots, or rural property and need visuals that make the opportunity easier to understand.

Structure Concepts

Create cabin, farmhouse, glamping, subdivision, and custom concept visuals from a real land photo.

Seasonal Marketing

Turn one selected base image into all four seasons or a location-aware month.

Listing Support

Download visuals for MLS supplements, listing pages, email follow-up, and social ads.

What You Will Walk Away With

A set of photorealistic listing visuals: structure concepts, seasonal variants, and a location-aware image that can make the land feel easier to picture.

Step 1

Upload Your Land Photo

  • In the Listing Wand studio, upload the property photo you want buyers to understand faster. Image credits are called Magic in the app.
  • Use a clear photo with enough context for the land, road, view, or buildable area.
Step 2

Choose A Structure Concept

  • Use a Popular quick pick for Barndominium, Custom Home, Farm / Ranch / Homestead, or Retail / Shopping Center, or open the grouped selector for every structure type.
  • Listing Wand creates visual options that help buyers imagine one realistic use for the land.
Step 3

Use Smart Site Details Or Direct The Plan

  • Leave Site details on Smart to match the source view, size the project realistically, preserve the parcel, and make logical access.
  • Open Site details when you want a closer aerial or ground-level view, compact or expansive scale, gravel or paved access, different site treatment, visible property lines, Sunny blue sky, or Twilight lighting.
  • Add up to three references and identify each as Building style, Site layout, or Placement sketch so Listing Wand uses only the intended details.
Tip: Property lines still constrain placement when you remove them from the finished image. Temporary arrows and placement marks are removed.
Step 4

Create Several Options

  • Set Image Generations to 4 when you want several directions to compare.
  • Click Make Magic (the generate button) to start the run.
Step 5

Review And Download Your Favorites

  • Finished visuals appear under Magic Results as they are ready.
  • Open full size to inspect details, then download the images that best support the listing.
  • Use Make Twilight on a finished result when you want a lighting-only evening variant without rebuilding the site concept. It preserves the result's 1K, 2K, or 4K size and costs the matching 1, 2, or 4 Magic.
Step 6

Use The Best Concept As Your New Base Image

  • On your favorite result, click Use as "Original Listing" photo.
  • That selected image becomes the base for seasonal versions.
Step 7

Generate All Four Seasons

  • Switch to Seasons in the left panel.
  • Click All Four Seasons, then click Make Magic.
Step 8

Download Seasonal Listing Images

  • You will get Spring, Summer, Fall, and Winter versions from the selected base image.
  • Use them for seasonal campaigns, listing refreshes, and buyer follow-up.
Step 9

Create A Location-Aware Month

  • In Smart Season, choose the Country, State/Province/Region, City, and Month.
  • For example: Canada, British Columbia, Kelowna in October.
  • Click Make Magic.
Step 10

Use The Best Seasonal Match

  • Your result appears in Magic Results with the month and location in the title.
  • Download it when the image matches the listing season and market story.

Rooms & Interiors

Stage, Clean Up, And Polish Room Photos

Use this walkthrough when a home listing needs staged rooms, cleaner occupied-room photos, brighter interiors, or a more polished presentation.

Virtual Staging

Add realistic furniture and decor to empty bedrooms, living rooms, dining rooms, kitchens, bathrooms, and entryways.

Room Clean-up

Remove clutter, personal items, dirt, and dim lighting while preserving the real room.

Interior Tools

Use room tools and advanced instructions for lighting polish, cleanup, furniture changes, and listing-ready edits.

What You Will Walk Away With

A staged or cleaned-up room photo that helps buyers understand scale, function, and presentation without changing the underlying property.

Step 1

Upload A Room Photo

  • Switch to Rooms, then upload the interior photo you want to improve.
  • Use the real listing photo as the base so the room layout, windows, doors, and camera angle stay truthful.
Step 2

Clean Up Rooms That Need Listing Prep

  • Use Clean-up when a room needs clutter removed, personal items hidden, surfaces cleaned, or lighting improved.
  • Choose one or more clean-up edits, then generate when the photo should stay mostly as-is.
Tip: Clean-up is best for occupied rooms, rental turnovers, quick listing prep, and photos that need polish without new furniture.
Step 3

Choose The Room Type And Staging Goal

  • Open Staging when you want to add furniture or refresh movable furniture.
  • Pick the room type, then choose whether the room is empty, fully replacing furniture, or partly furnished.
Step 4

Generate A Few Staging Options

  • Choose how many versions you want before the run.
  • Click Make Magic to create listing-ready staging options from the uploaded room photo.
Step 5

Review, Download, And Market Responsibly

  • Compare the staged results and download the ones that look most natural for your listing.
  • Use virtual staging to show furniture possibilities while keeping the listing accurate about room dimensions and fixed property features.

Questions

Questions Before You Start

Can Listing Wand create visuals for both land and rooms?

Yes. Listing Wand supports land concept visuals, seasonal variants, virtual room staging, room cleanup, exterior refreshes, and photo polish workflows.

Which rooms can Listing Wand stage?

Listing Wand can stage bedrooms, living rooms, dining rooms, kitchens, bathrooms, and entryways. It can add furniture to empty rooms, replace movable furniture, or add finishing touches to partly furnished rooms.

Does room staging change the real room layout?

Room edits are intended to preserve the original layout, room dimensions, camera angle, windows, doors, closets, built-ins, and exterior views while changing furniture, decor, clutter, lighting, or photo polish.

Can I use the finished images in a real listing?

Yes. Download finished visuals for listing pages, seller updates, social posts, and buyer follow-up. When a marketplace asks for virtual staging or AI-edit labels, include them clearly so buyers know what they are viewing.

Ready To Try It On Your Next Listing?

Start with 5 free AI listing visuals, upload a property photo, and create land visuals, staged rooms, room cleanup edits, or seasonal images. Prefer done-for-you delivery? Choose a full-service package instead.